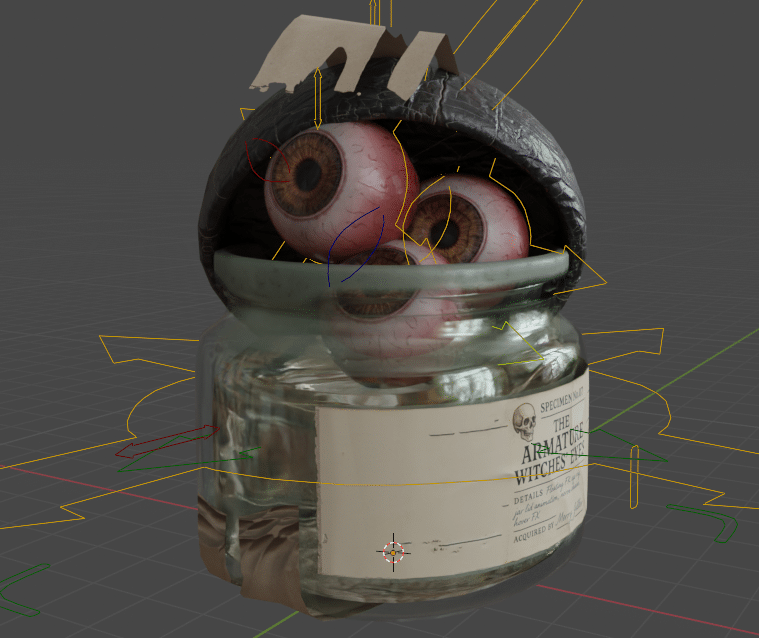
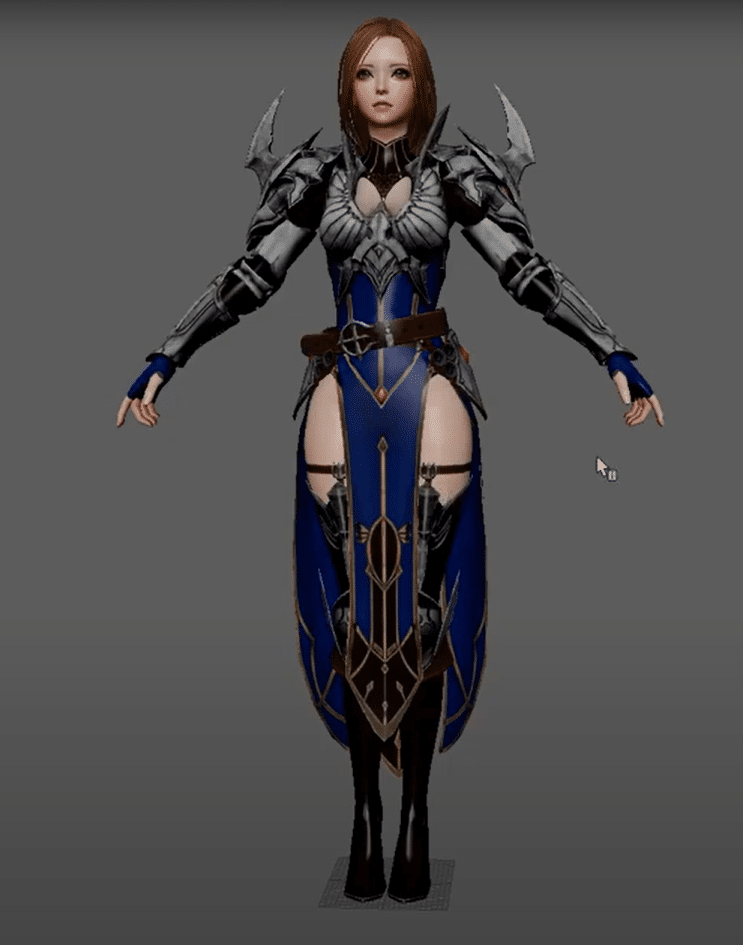
Categories
Blog Post chracter contorl rig rigtip tip tutorial

Creating a highly stylized 3D Character Rig in Blender: Filibert the Fish

Guest post by Julien Bazin

Introduction and Motivation

This project was a long time coming, but it was a very fun and educational experience. I learned a great deal about balancing creative ambition with technical challenges. It all started with a 2D character concept by Nelnal (@nelnalium on Twitter). Their style, featuring flat colors and highly stylized proportions, resonated with the kind of characters I wanted to focus on in my own work.

https://x.com/nelnalium/status/1245358078440046592 

The first character I created based on their designs was this:
https://www.artstation.com/artwork/ZaORX8,

which was even reposted by Nelnal on Twitter!

After completing that project, I decided to tackle something much more complex—Filibert the Fish. The goal was to recreate the reference image as closely as possible. In hindsight, this took more work than I expected, but despite the challenges, I’m proud of the final result.

Project Challenges and Goals

Recreating the reference image required a steep learning curve, especially in adapting the heavily NPR style to 3D. There were many holes in my rigging knowledge, so it took quite a bit more time than I initially expected.  I will highlight these in more detail in the technical breakdown*. While the end product is a success overall, I’d like to find more time-efficient ways to approach similar projects in the future.

One of the key challenges was balancing fidelity with technical feasibility, as I wanted to be as accurate to the reference image as possible.  I had to figure out how to achieve the various shapes and poses that both the fish and mech displayed in the reference, while retaining enough flexibility for an animator to feel comfortable when animating it. Additionally, I had to figure out how to organize and render the rig efficiently while making it easy to use for animators, something I had not done much of before on manually-created rigs.  YouTube tutorials at 2x speed came really in handy here!

Technical Breakdown of the Rig

General Rig Setup

  • The mech and fish rigs are separated for organization and performance reasons.
  • The fish is not visible in the viewport when the water is active in rendered mode. To simplify animation previews, the water is made translucent in viewport shading mode.

Limb and Spine Setup

  • All limbs and the spine use spline IK due to the rubber-hose nature of the character.
    • Bones labeled “SPL” control the handles of the curve, which drive the spline IK chain for deformation.
    • A standard FK/IK switch setup drives the entire system.
    • “Follow” bones add automatic curvature control, enabling either a normal bent elbow or a full rubber-hose look. These are adjustable via custom properties labeled “_CURVE” in the Rig UI.
  • *I had some experience creating spline IK in Maya, but here in Blender it works a little differently.  I initially wanted to figure out how to create a spline IK twist, but as far as I know there is no way to create that by just using the curve.  Thankfully the rig did not end up needing it as all the bendy sections do not need to twist.

Arm Links

  • The arm links are controlled via a separate system using the spline IK curve as a base:
    • A “Curve” modifier is applied to a subdivided plane, allowing it to follow the spline IK curve when it is deformed.
    • Arm link bones use a “Copy Location” constraint to follow their respective vertex groups on the affected plane, achieving a sliding effect along the curve as the plane is moved.
  • *The way to achieve it here is different from in Maya, where you use nHair follicles on the surface of a nurbs plane that follow as it deforms.  You then make joints at each follicle, and make each follicle the parent of the joint so that you can then skin whatever you need.  I tried to apply this same thought process to the blender version, but it took quite a bit of research on modifiers that I was unfamiliar with at the time and a lot of experimentation before I landed on something that worked.

Hose Effects

  • All hoses use a “Cast” modifier with a locator to simulate a bubble effect, as though the hose is ballooning with water.
    • A cylinder affects a “Vertex Weight Proximity” modifier on the arms, causing the bubble to shrink as the arm links pass over it.
  • *This was an extra feature I came upon by accident while messing around with modifiers, and I realized I could limit the Cast modifier using the Vertex Weight Proximity modifier to create a sort of “live” weight group, and even dial in the amount I wanted it to affect the Cast through both the size of the cylinder and vertex weights.

Additional Features

  • Limb foreshortening controls were partially implemented but remain limited. This was because lattices didn’t work as I expected on the limbs, so for the animation, lattices were only used on the hands for smear frames.
  • Extra pivot bones allow for alternative IK control pivots. However, interpolation issues mean the rotation must be keyed manually.  This was an experimental feature that works if needed, but was not as useful as I had hoped.
  • The body uses two separate spline IK curves:
    • The body curve drives the torso, hips, and overall spine movement.
    • The spine curve, driven by the body curve, controls the spine hose independently.

Water, Hats, and Facial Controls

  • The water effect was created using a sphere for the visible model and a separately rigged cylinder that Booleans out any section that overlaps with the sphere.  This way the water level can be changed dynamically, and waves or ripples can even be added.
  • The hats for both the fish and the mech use shrinkwrapped bones parented to rotational controls, ensuring proper pivots that follow the mesh deformation.
  • The fish’s eyelids and eyebrows are shrinkwrapped with offset adjustments:
    • Leading edges and the center have a slight positive offset.
    • Other areas have a negative offset to blend into the head seamlessly.
    • Freestyle edges are marked to generate grease pencil lines for the leading edges.
  • Facial controls include shapekeys for additional expressions, though the range is limited due to grease pencil’s line art generation at certain camera angles and minimal manual expression control.

Rendering and Performance

  • Grease pencil is too performance-intensive for real-time animation previews. Animators may need to toggle it on and off in the outliner.
  • A Rig UI option allows subdivision reductions for better performance.
  • For rendering, Blender’s view layer system was used to render parts of the rig separately and overlay them in the compositor. For example:
    • The fish is rendered in front of the water but behind the glass and mech parts.
    • Unfortunately, the real-time compositor doesn’t support view layers, complicating animation previews and required the layers be rendered separately and then reassembled in the compositor for rendering.

Animator Feedback and Reflections

Special thanks to my friend Ben Hogue for animating the rig: www.x.com/einerjeti

Animator Suggestions

  • The fish’s rig lacked a conventional FK tail/body and a full-body control separate from the rig root. Adding these would have improved usability.
  • The fish’s face controls could have benefited from an option to completely hide the eyelids and a greater range of expressions.

My Reflections

  • Adding FK controls and a separate body control to the fish is a relatively simple fix, but I didn’t implement it before the animation was completed. I’ll prioritize this for future rigs.
  • I focused too much on replicating the reference’s expressions accurately, which limited the overall range. Having a combination of shape keys and standard deformation controls would have made it more flexible.
  • Some of the features like the “Cast” modifier bubbles were not in the reference and while cool, took up a great deal of time that could have been dedicated to finishing the rest of the project more quickly.
  • Some scripting to automate the more repetitive and error-prone processes of manual rigging would have helped greatly in efficiency.

Lessons Learned and Advice #rigTIP

For anyone attempting a similar project, here’s my advice:

  • Outline your goals and timeline clearly: This will help you stay focused and limit unnecessary features.
  • Seek feedback frequently: Input from others provides valuable insight and helps you refine your work.
  • Know when to stop: It’s easy to get carried away, but learning your limits is essential for finishing projects efficiently and staying motivated to keep going.  Finishing a project is more important than getting it exactly the way it is in your head!

I’m proud of what I achieved with Filibert the Fish and look forward to applying the lessons I’ve learned to future characters. Thank you for reading, and I hope this inspires you to tackle your own ambitious projects.  Remember, perfect is the enemy of good! 😉

More of My Stuff

You can find more of my work by following these links:

Twitter: https://x.com/B0ilz

LinkedIn: https://www.linkedin.com/in/julien-bazin-632016134/

ArtStation: https://www.artstation.com/b0ilerplate

Blender software logo community badge

Special thanks to Brad Clark @Rigging Dojo for the rigging advice and troubleshooting and Blender help during this project.

Categories
#animtip education rigtip tutorial

Complete Maya to Unreal 5 Character Skinning and Setup

In this series, our friend and mentor, Jeremy Ernst goes through cleaning up a model purchased from a marketplace and shows the complete skinning game character for Unreal Engine.

Model used can be found here:
https://www.cgtrader.com/3d-models/character/fantasy-character/dominique-girl

Song title: Passengers.
Artists: chromonicci
Courtesy of Riot Games
https://www.leagueoflegends.com/en-us/news/community/riot-music-creator-safe-guidelines/

Description

  • This video series goes through:
  • Cleaning up a model before placing joints and skinning
  • Joint placement and orientation fundamentals
  • Skinning with ngSkinTools 2
  • Importing your mesh and skeleton into UE5
  • Retargeting animations to your mesh
  • Setting up dynamics (cloth, physics)
  • Getting the character playable

Maya to Unreal 5 Character Skinning and Setup

Part 1: Cleaning up the Model
In this video, I will go through cleaning up a model purchased from a marketplace to be better for skinning.

Part 2: Joint Placement Fundamentals
I’ll go over some fundamental concepts with joint placement, joint orientation, and rotate orders.

Part 3: Joint Placement Timelapse

Part 4: Joint Placement Overview , I’ll briefly go over the initial joint placement I landed on for this character.
For more information on mGear:  / mgearriggingframework  

Part 5: Skinning The Upper Body
I will begin skinning the upper body using ngSkinTools2. ngSkinTools: https://www.ngskintools.com/ Installing: https://www.ngskintools.com/v2/installing/

Part 6: Skinning The Hands Let’s skin the hands and fingers while listening to some chill beats.

Part 7: Skinning The Hair
will skin the rest of the upper body parts, and skin the hair. As mentioned in the video, here is the blog post on creating proxy meshes: https://www.jeremyernst.com/devblog/2…

Part 8: Skinning The Lower Body
In this part, I will skin all of the lower body pieces, except for the cloth.

Part 9: Skinning The Cloth
I’ll focus on skinning the cloth. (sorry for the audio quality on this one, not sure what happened!)

Part 10: Joint Placement Edits
After skinning the cloth, I realized some of the joints could be better placed. In this part, I will edit the joint placements of the cloth and tidy up any weights as a result.

Part 11: Building a Hair Sim Mesh
I’ll be doing the last touches in Maya to get our mesh ready for export into Unreal Engine.

You can find the extended playlist on Jeremy Ernst YouTube channel where he moves the character into Unreal Engine.

Thank you for letting us publish the rigging and skinning section and for being a supporter of us and of sharing rigging knowledge.

Categories
Blog Post

Blender in Norway Spillkonventet 2024

Film, Games and Blender 2024!

https://vikenfilmsenter.no/spillkonventet

Brad was invited to give a short talk on Blender improvements and he shared some of the important features that generalists and animators should know, spotlighting all the new work over the years put into improving Blender.

He also lead a workshop on general rigging tips and tricks and covered in depth Q&A around FBX and game work and animation layer workflow in the NLA.

Here are the talk slides

Want to learn more… check out our free course on how to Move or use Blender as a Maya artist.

Unreal – Unity work with Blender

If you want to understand in-depth about game export settings our friend Pierrick Picaut at P2Design has an amazing in depth free tutorial including some NLA tips.

Categories
#animtip Character Face

Updated FACS Cheat Sheet

Our friend Melinda Ozel, Expression Scientist and creator of the best resource to understand facial movement, her Face the FACS site, just got some new updates so go check it out!!

‘Face the FACS’ has some new treats for you. Just rolled out a few updates with additional facial action descriptions and a fresh batch of references.

Categories
#animtip Blog Post

Animator questions we always answer in Blender

While we have a full free course on getting up to speed on Blender from Maya here are a few extra tips to help you animate easier.

Question 1:
Is there a way to auto-frame a channel f-curve in Blender in the Graph Editor?
Answer:
Yes, https://cenda.gumroad.com/l/autoframe-fcurve

But in 3.6 there are some new updates to framing you might also like
Frame Channels Operator
Allows to frame onto the contents of a channel, or a selection of channels. Works in the Graph Editor and the Dope Sheet. PR #104523 It is called with “.” on the numpad or right click the channels and choose the “Frame Selected Channels” option. Alternatively press ALT+MMB to frame the channel under the cursor.

Question 2:
There used to be a preference to turn on and off “Only Show Selected Keyframes” but it became a global not per-file preference in 3.6
From the Release notes,
Settings moved to the User Preferences

Two view options in the Graph Editor have been moved to the User Preferences (Only Selected Curve Keyframes, Use High Quality Display). (PR #104532 Animation: Move Graph Editor settings to User Preferences)

Moved Graph Editor Settings.png


Answer:
This addon will let you put it in a Q quick menu to make it easy to toggle again.
Download it here “only_show_selected_keyframes.py” from Dr. Sybren.

bl_info = {
    "name": "Only Show Selected Keyframes",
    "author": "dr. Sybren",
    "version": (1, 0),
    "blender": (3, 6, 0),
    "location": "Graph Editor > View",
    "description": "Show a 'Only Show Selected Keyframes' option in the graph editor header",
    "warning": "",
    "doc_url": "",
    "category": "Animation",
}


import bpy


def draw_menu(self, context):
    layout = self.layout
    layout.prop(context.preferences.edit, 'show_only_selected_curve_keyframes')


def register():
    bpy.types.GRAPH_HT_header.append(draw_menu)


def unregister():
    bpy.types.GRAPH_HT_header.remove(draw_menu)


if __name__ == "__main__":
    register()

Question 3:
The keys and handles are hard to tell apart and see

Answer:
In the Blender Edit Menu- Preferences-Themes-Graph Editor you can find Vertex Size and Handle Vertex Size and adjust them so you can more easily tell them apart.

Question 4:
In Maya I can quickly insert a key with the mouse on a curve without moving the timeline, is that possible in Blender?

Answer:
Yes in the Blender Graph Editor you can hold CTRL and Right click to insert a key anywhere you want on a curve. Note that it won’t snap to the frame but you can hold Shift S to bring up the snap menu and snap it to nearest frame when you are done.

Question 5:
Inserting keys and editing them moves the curve and impacts the other keys too much, what Blender setting makes the keys most like Maya?
Answer:

Answer, setting your curve to Bezier and the keys to Auto Clamped will give you the most similar feel to Maya when editing the keys. Not that Blender tangent handles are never fixed, but if you want to edit them without causing them to lengthen you can simply use the rotate tool to rotate the handles.

A bonus trick with the “Set Keyframe Interpolation” is that you can change back and forth between Constant and Bezier as you want to check blocking or to un-spline for a bit to work on poses and timing and when you turn it back to Bezier, it will leave your keys/tangents alone. So you can jump back and forth between the two and not loose your work.

Check out our free Maya to Blender course https://ondemand.riggingdojo.com/MayaToBlender and our other Blender resources here on our Blog.