Categories
#animtip education rigtip tutorial

Complete Maya to Unreal 5 Character Skinning and Setup

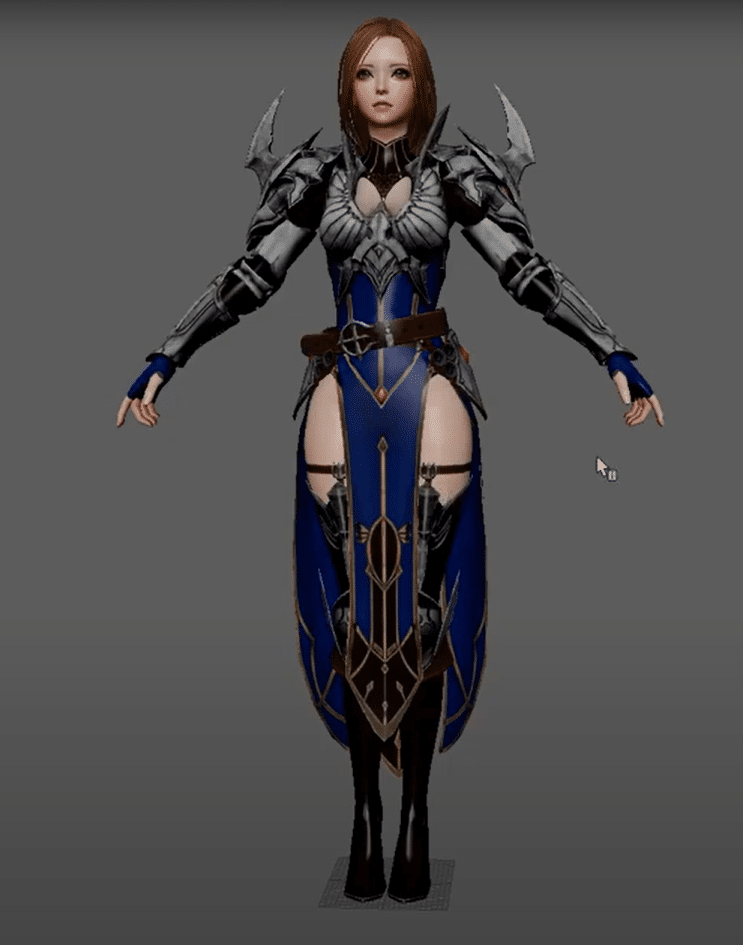
In this series, our friend and mentor, Jeremy Ernst goes through cleaning up a model purchased from a marketplace and shows the complete skinning game character for Unreal Engine.

Model used can be found here:
https://www.cgtrader.com/3d-models/character/fantasy-character/dominique-girl

Song title: Passengers.
Artists: chromonicci
Courtesy of Riot Games
https://www.leagueoflegends.com/en-us/news/community/riot-music-creator-safe-guidelines/

Description

  • This video series goes through:
  • Cleaning up a model before placing joints and skinning
  • Joint placement and orientation fundamentals
  • Skinning with ngSkinTools 2
  • Importing your mesh and skeleton into UE5
  • Retargeting animations to your mesh
  • Setting up dynamics (cloth, physics)
  • Getting the character playable

Maya to Unreal 5 Character Skinning and Setup

Part 1: Cleaning up the Model
In this video, I will go through cleaning up a model purchased from a marketplace to be better for skinning.

Part 2: Joint Placement Fundamentals
I’ll go over some fundamental concepts with joint placement, joint orientation, and rotate orders.

Part 3: Joint Placement Timelapse

Part 4: Joint Placement Overview , I’ll briefly go over the initial joint placement I landed on for this character.
For more information on mGear:  / mgearriggingframework  

Part 5: Skinning The Upper Body
I will begin skinning the upper body using ngSkinTools2. ngSkinTools: https://www.ngskintools.com/ Installing: https://www.ngskintools.com/v2/installing/

Part 6: Skinning The Hands Let’s skin the hands and fingers while listening to some chill beats.

Part 7: Skinning The Hair
will skin the rest of the upper body parts, and skin the hair. As mentioned in the video, here is the blog post on creating proxy meshes: https://www.jeremyernst.com/devblog/2…

Part 8: Skinning The Lower Body
In this part, I will skin all of the lower body pieces, except for the cloth.

Part 9: Skinning The Cloth
I’ll focus on skinning the cloth. (sorry for the audio quality on this one, not sure what happened!)

Part 10: Joint Placement Edits
After skinning the cloth, I realized some of the joints could be better placed. In this part, I will edit the joint placements of the cloth and tidy up any weights as a result.

Part 11: Building a Hair Sim Mesh
I’ll be doing the last touches in Maya to get our mesh ready for export into Unreal Engine.

You can find the extended playlist on Jeremy Ernst YouTube channel where he moves the character into Unreal Engine.

Thank you for letting us publish the rigging and skinning section and for being a supporter of us and of sharing rigging knowledge.

Categories
#animtip Character Face

Updated FACS Cheat Sheet

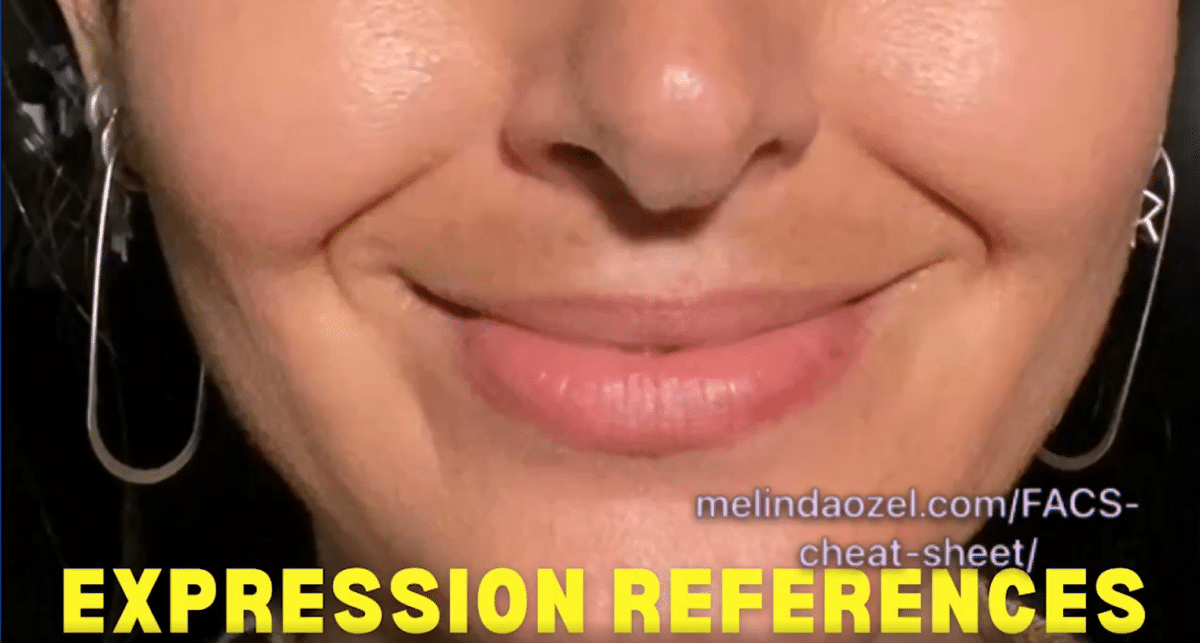
Our friend Melinda Ozel, Expression Scientist and creator of the best resource to understand facial movement, her Face the FACS site, just got some new updates so go check it out!!

‘Face the FACS’ has some new treats for you. Just rolled out a few updates with additional facial action descriptions and a fresh batch of references.

Categories
#animtip Blog Post

Animator questions we always answer in Blender

While we have a full free course on getting up to speed on Blender from Maya here are a few extra tips to help you animate easier.

Question 1:
Is there a way to auto-frame a channel f-curve in Blender in the Graph Editor?
Answer:
Yes, https://cenda.gumroad.com/l/autoframe-fcurve

But in 3.6 there are some new updates to framing you might also like
Frame Channels Operator
Allows to frame onto the contents of a channel, or a selection of channels. Works in the Graph Editor and the Dope Sheet. PR #104523 It is called with “.” on the numpad or right click the channels and choose the “Frame Selected Channels” option. Alternatively press ALT+MMB to frame the channel under the cursor.

Question 2:
There used to be a preference to turn on and off “Only Show Selected Keyframes” but it became a global not per-file preference in 3.6
From the Release notes,
Settings moved to the User Preferences

Two view options in the Graph Editor have been moved to the User Preferences (Only Selected Curve Keyframes, Use High Quality Display). (PR #104532 Animation: Move Graph Editor settings to User Preferences)

Moved Graph Editor Settings.png


Answer:
This addon will let you put it in a Q quick menu to make it easy to toggle again.
Download it here “only_show_selected_keyframes.py” from Dr. Sybren.

bl_info = {
    "name": "Only Show Selected Keyframes",
    "author": "dr. Sybren",
    "version": (1, 0),
    "blender": (3, 6, 0),
    "location": "Graph Editor > View",
    "description": "Show a 'Only Show Selected Keyframes' option in the graph editor header",
    "warning": "",
    "doc_url": "",
    "category": "Animation",
}


import bpy


def draw_menu(self, context):
    layout = self.layout
    layout.prop(context.preferences.edit, 'show_only_selected_curve_keyframes')


def register():
    bpy.types.GRAPH_HT_header.append(draw_menu)


def unregister():
    bpy.types.GRAPH_HT_header.remove(draw_menu)


if __name__ == "__main__":
    register()

Question 3:
The keys and handles are hard to tell apart and see

Answer:
In the Blender Edit Menu- Preferences-Themes-Graph Editor you can find Vertex Size and Handle Vertex Size and adjust them so you can more easily tell them apart.

Question 4:
In Maya I can quickly insert a key with the mouse on a curve without moving the timeline, is that possible in Blender?

Answer:
Yes in the Blender Graph Editor you can hold CTRL and Right click to insert a key anywhere you want on a curve. Note that it won’t snap to the frame but you can hold Shift S to bring up the snap menu and snap it to nearest frame when you are done.

Question 5:
Inserting keys and editing them moves the curve and impacts the other keys too much, what Blender setting makes the keys most like Maya?
Answer:

Answer, setting your curve to Bezier and the keys to Auto Clamped will give you the most similar feel to Maya when editing the keys. Not that Blender tangent handles are never fixed, but if you want to edit them without causing them to lengthen you can simply use the rotate tool to rotate the handles.

A bonus trick with the “Set Keyframe Interpolation” is that you can change back and forth between Constant and Bezier as you want to check blocking or to un-spline for a bit to work on poses and timing and when you turn it back to Bezier, it will leave your keys/tangents alone. So you can jump back and forth between the two and not loose your work.

Check out our free Maya to Blender course https://ondemand.riggingdojo.com/MayaToBlender and our other Blender resources here on our Blog.

Categories
#animtip Blog Post constraints

A Complete Guide to Character Rigging for Games Using Blender

https://www.routledge.com/A-Complete-Guide-to-Character-Rigging-for-Games-Using-Blender/Halac/p/book/9781032203003ISBN 9781032203003
296 Pages 278 Color & 15 B/W Illustrations
September 19, 2023 by CRC Press

https://www.routledge.com/A-Complete-Guide-to-Character-Rigging-for-Games-Using-Blender/Halac/p/book/9781032203003

We are so excited to see this book make it to the finish line and get published. Rigging Dojo co-founder Brad Clark getting a special thanks in the Acknowledgements is a nice bonus as well as our mentor Charles Wardlaw, creator of our Free Preview: Optimizing Rigs for Parallel Evaluation course.

About the book

This book is a comprehensive guide to using Blender to create character rigs for games, breaking down the technicalities of rigging tools and techniques into easily digestible chunks. It provides all the tools needed to go from a static character model to an animation-ready, high quality, and fast performing game rig.

Written to be accessible and easy to follow, the book covers character rigging theory that is supported by industry standard examples of how to apply that theory to character rigs for video games. It demonstrates the reasoning behind rigging decisions followed by instructions and examples on how to apply that knowledge to rig creation. It includes chapters that focus on the character deformation techniques that raise the visual quality of the model and subsequently of the animation and game it will be used in.

This book will be vital reading to those studying games animation as well as early-career rigging artists, character animators, modeling artists, technical animators, and technical artists.

Biography

Armin Hala? is a video game technical and character animator originally from Sarajevo, Bosnia and Herzegovina, currently living and working in Berlin, Germany. With over a decade of experience, Armin is a principal animator in a genre leading, story driven game studio. His previous work includes creating rigs and animation for games, short films, and ads.

When Armin isn’t working on his next project, he can be found cycling, creating music, and taking long walks with his two dogs, Mitzi and Pablo.

You can find him on X at @ArminHalac or visit his website www.arminhalac.com.

Categories
#animtip Blog Post

Auto-Rig Pro: Rig Library

One of our alumni and animator, Joris van Laar, created this library of 24 rig presets for the Blender Auto-Rig Pro, auto rigging and retargeting addon. We are an affiliate so if you buy it from this link we get a small part of the sale and you support our future students and our free training resources and contribute to the Blender fund when you buy on Blender Market.

Auto-Rig Pro: Rig Library includes everything from Allosaurs to Horse rigs and Kangaroo to spider rigs and many more.

Auto-Rig Pro recommendation

Some of our earliest Blender work at Rigging Dojo was looking at what rigging and retargeting options were viable in Blender and we came across Auto-Rig pro. It had both a nice rigging system as well as a good retarget tool. We reached out to the creator and suggested a few improvements and now have live retarget editing so you can make adjustments on the retarget before you bake.

We have worked with many clients using Auto-rig pro and it is our recommended retargeting toolkit when using motion capture in Blender.

To have these rigs work fully you will need to have or get the Auto-rig pro addon but both combined are still cheaper than buying tokens to run other 3d tools.

Important: This is not a standalone product.
It requires Auto-Rig Pro (version 3.68.12 and up), get it here.

About the Auto-Rig Pro addon

Auto-Rig Pro is an addon for Blender to rig characters, retarget animations, and provide Fbx/Gltf export, with presets for Unity, Unreal Engine, Godot. First developed as my own in-house rigging tool, i’ve released it a few years ago and it expanded quickly thanks to great support from the community!

Find out more about the Auto-Rig Pro addon and try out the character rig yourself.

Want to try first? Download Mike, free character rig here.

Rig features demo

Useful links:
Documentation -Learn here!
Frequently Asked Questions
Youtube Channel – Tutorials and demos
Twitter – Follow development

Our friends at CGDive have a great set of free training videos on building your own custom rigs

Check out the rig system and the rig pack and if you are new to Blender be sure to check out our free course on our Rigging Dojo Ondemand site designed to help get you up and running in a few hours.