
Customizing Radical Heights – Part 2 In this post I will step over the process the artist will run through to get the assets ready for game. The artists can import the mesh from any DCC they choose to create the assets within. The setup process itself is handled entirely in Maya. Part 1 can be found here: https://techanimator.blogspot.com/2018/04/customizing-radical-heights-part-1.html Setting up the item We need to first import the artist created meshes into a clean Maya scene. As mentioned pr
Source: Tech Animator Dump: Customizing Radical Heights – Part 2

Customizing Radical Heights – Part 2

In this post I will step over the process the artist will run through to get the assets ready for game. The artists can import the mesh from any DCC they choose to create the assets within. The setup process itself is handled entirely in Maya.
Setting up the item
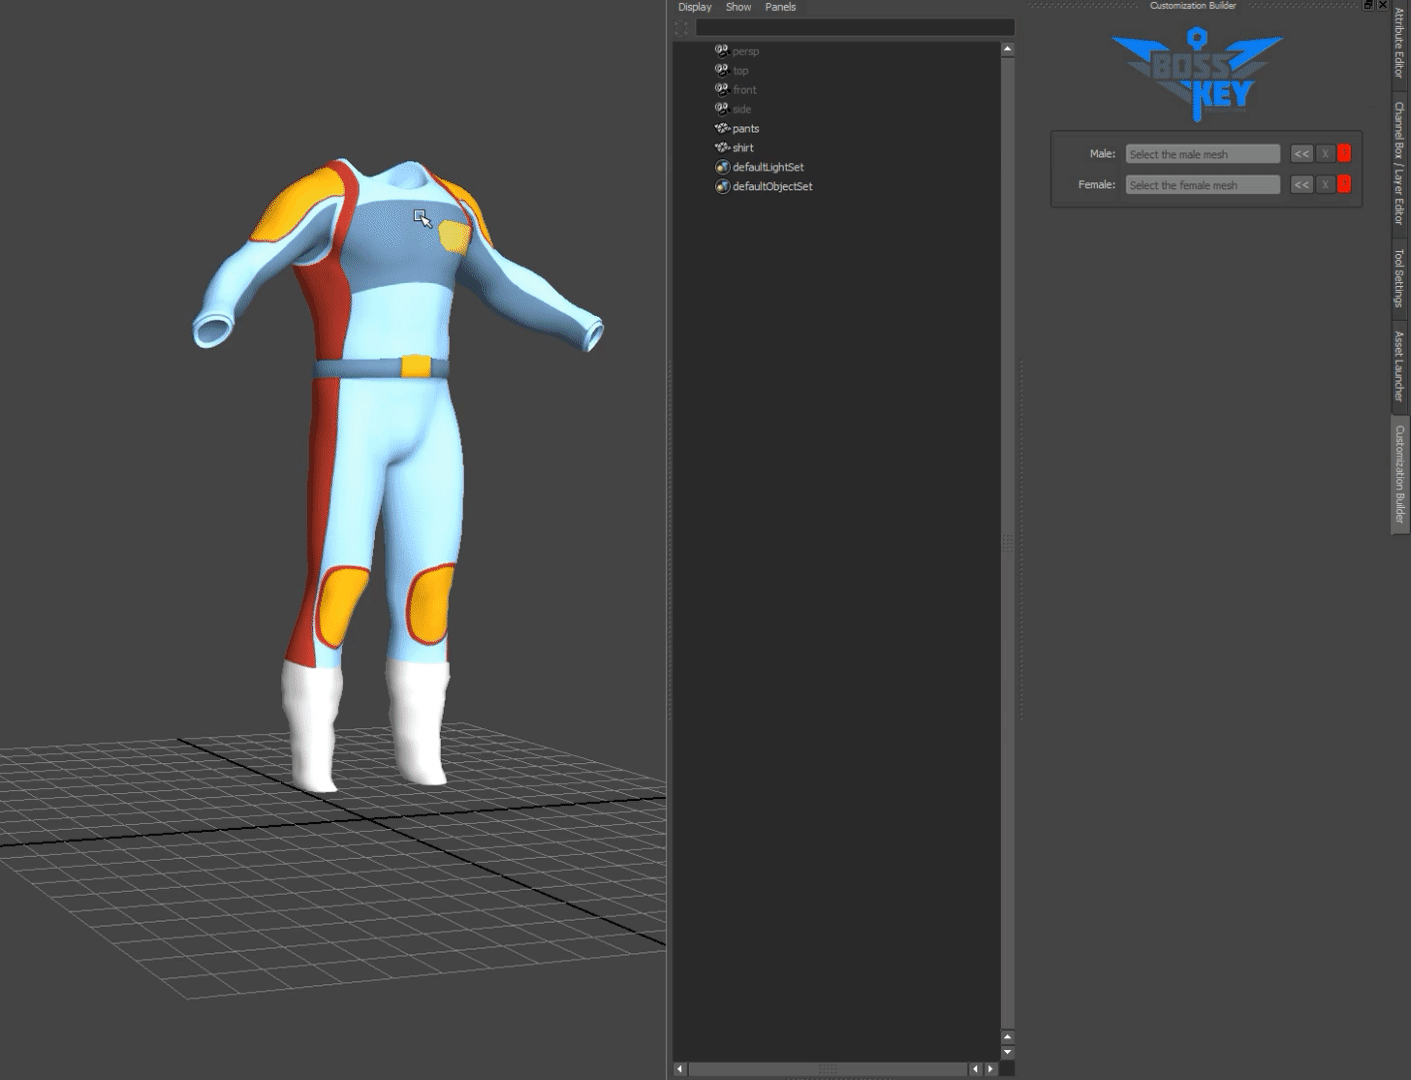
We need to first import the artist created meshes into a clean Maya scene. As mentioned previously the clothing is created for specific sections of the character. In this scene we have a shirt/upperbody and pants/lowerbody.
Assign the mesh
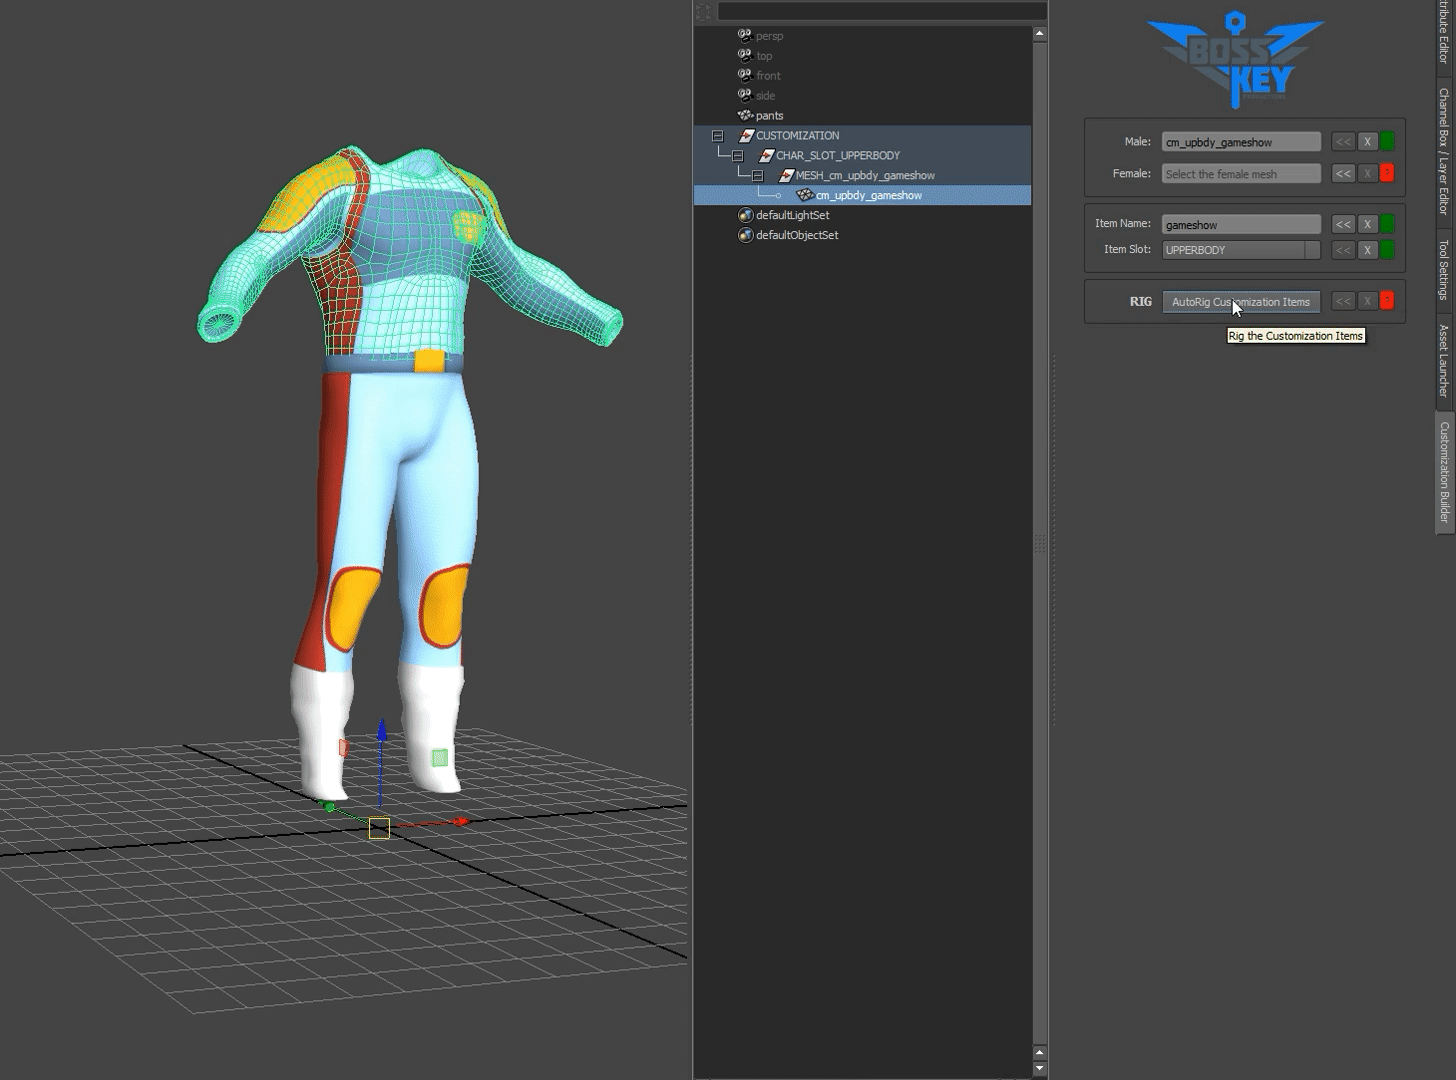
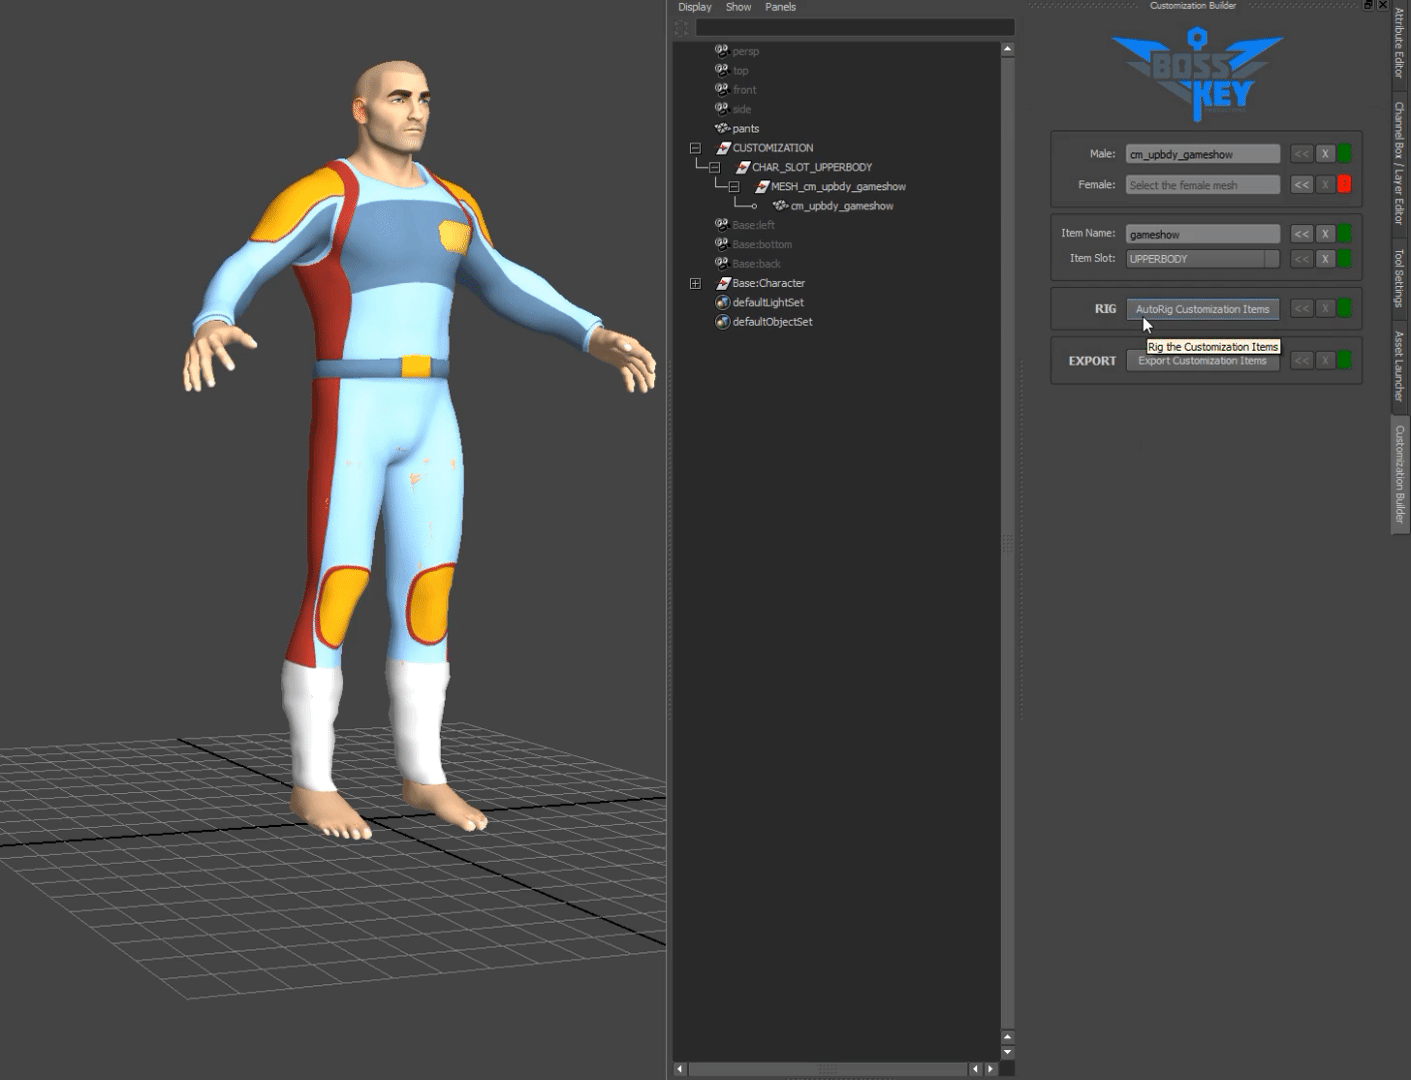
The artist runs the Customization Builder tool, selects the mesh and plugs the selection into the gender specific field. This field is used to determine which rig/skinned mesh the item will be constructed upon. Upon assigning the mesh it is evaluated for poly count, number of uv channels and number of material assignments. It also makes sure the transforms are correct on the mesh before attempting to bind to a skeleton.
Name Item & Associate Slot
Next we set a unique item name and then we assign the body slot/section for the clothing item. This will rename the mesh accordingly, create an export hierarchy and apply attributes to the groups and meshes used to rig and export the item. These attributes assist the tool when opened later and will also inform the export process how to handle the current asset.
- Assign the selected mesh
- Create a unique item name
- Choose the body part section
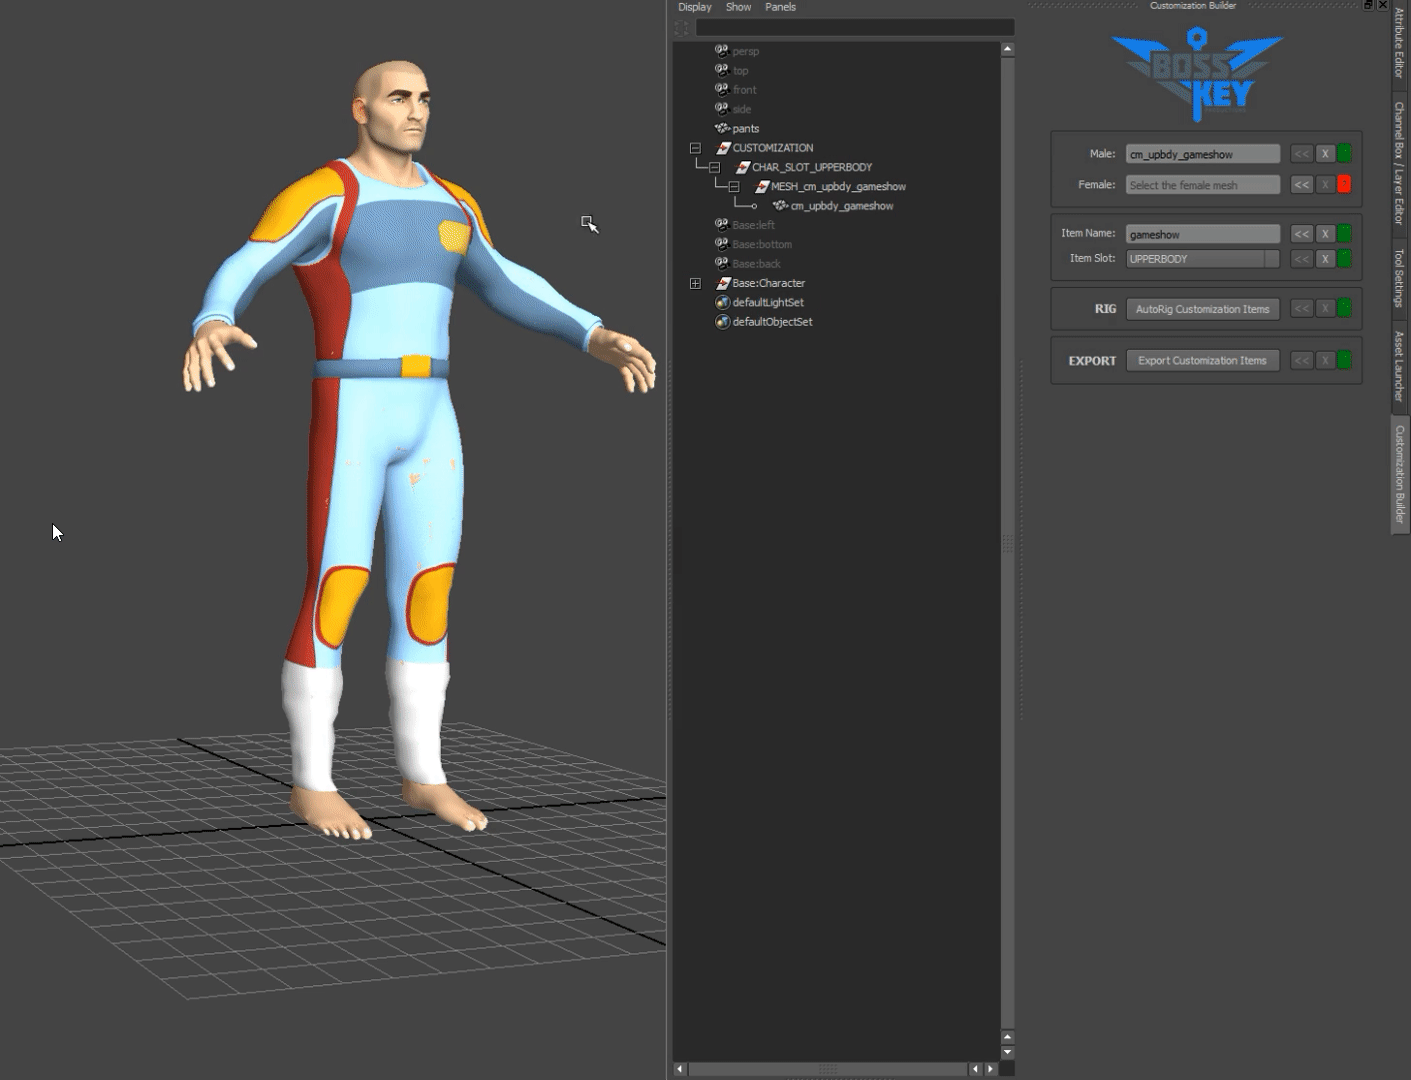
Rigging the mesh
In this stage we import a clean skinned base body mesh. We locate the flagged gender specific body mesh that was imported and copy the skinweights from the body to the clothing mesh. Additionally, the skinweights and bones are pruned based on the body part chosen, to use the least required amount possible.
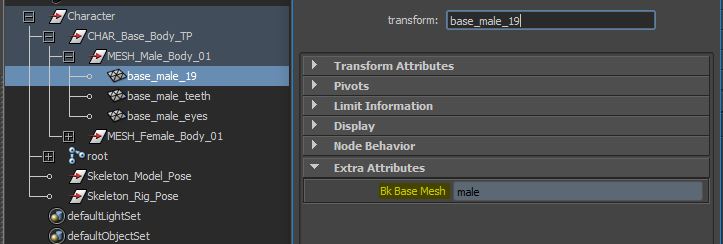 |
| The base body mesh is flagged for skinweight copying |
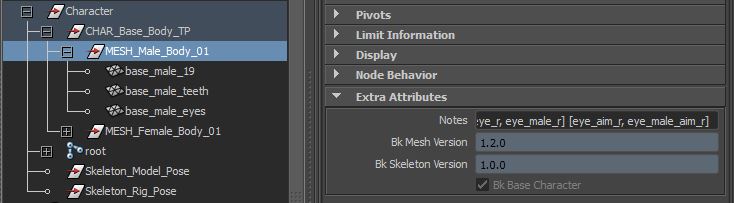 |
| Rigged body mesh is versioned to handle updates |
Rules for version updates:
- Major: This requires a complete replacement of the rig in the scene & skin copy update.
- Minor: The tool can update specific aspects of the mesh/rig without requiring a full update.
- Patch: These small changes can generally be ignored and likely require no updates.
Range of Motion
 |
| View mesh skinning with Range of Motion |
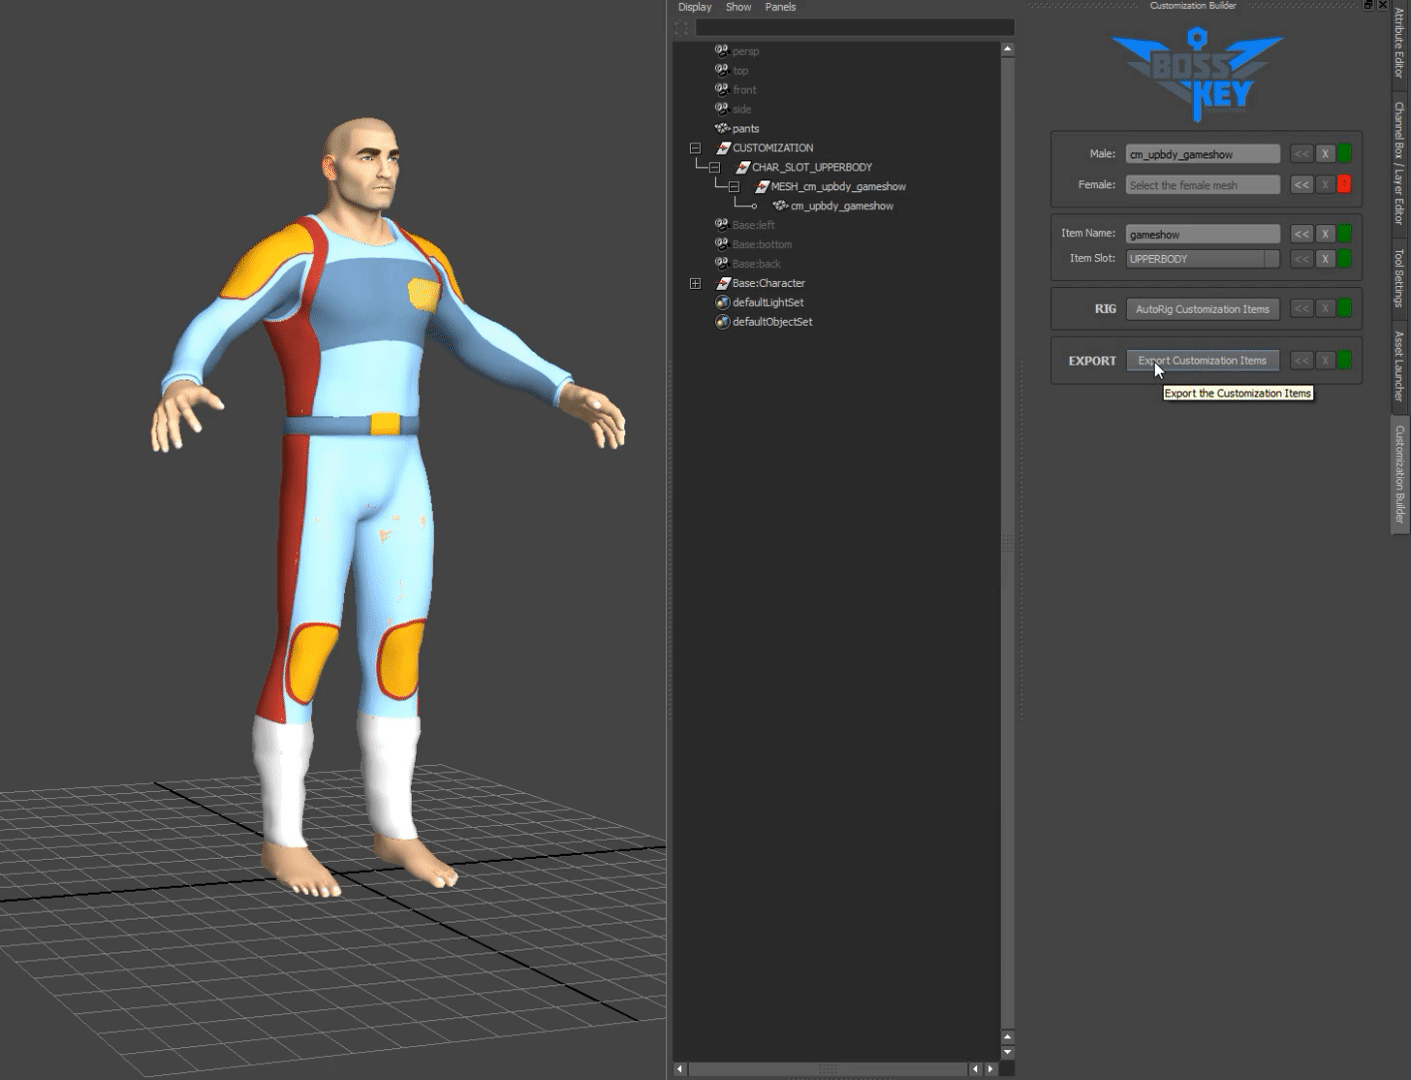
Exporting the mesh
Once everything looks good to go we can move forward with exporting the item. As was mentioned before the exporter handles all of the file naming and determines where to export relative to the project and the item slot. The file must also be saved and added to the depot in a proper location before exporting will occur. This ensures an artist that is putting assets into game will have the source file available as well.
On export the item FBX file is written out, a post-process is run on the FBX file to remove unnecessary nodes and correct the hierarchy where needed. A thumbnail is generated for our asset tool and all of the files are checked out and/or added to perforce automatically.
 |
| Exporting the mesh |
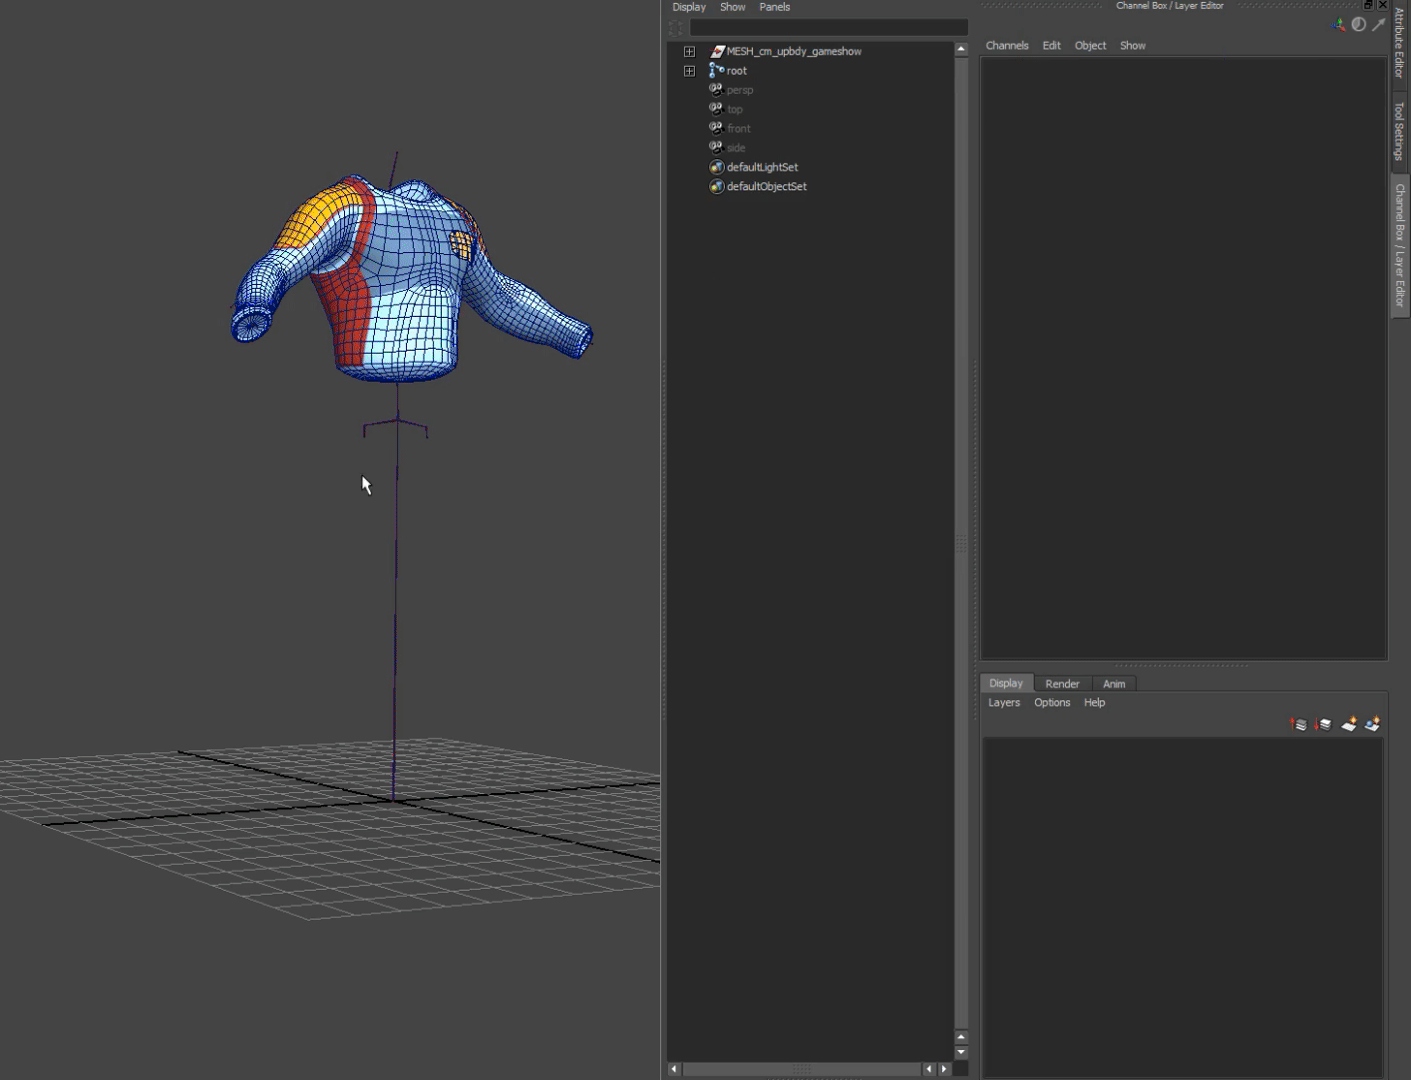 |
| The clean processed FBX file |